¶ Technical Manual – Carvera Air Mainboard Replacement & Breakdown
¶ 1. Tools & Safety Precautions
¶ Tools Required:
3mm Allen key
2mm Allen key
#2 Pozi screwdriver
¶ Safety Precautions:
✔ Ensure the machine is powered off before proceeding.
✔ Unplug all cables before beginning the disassembly.
¶ 2. Removing the Existing Mainboard
¶ 2.1 Removing the Rear Cover
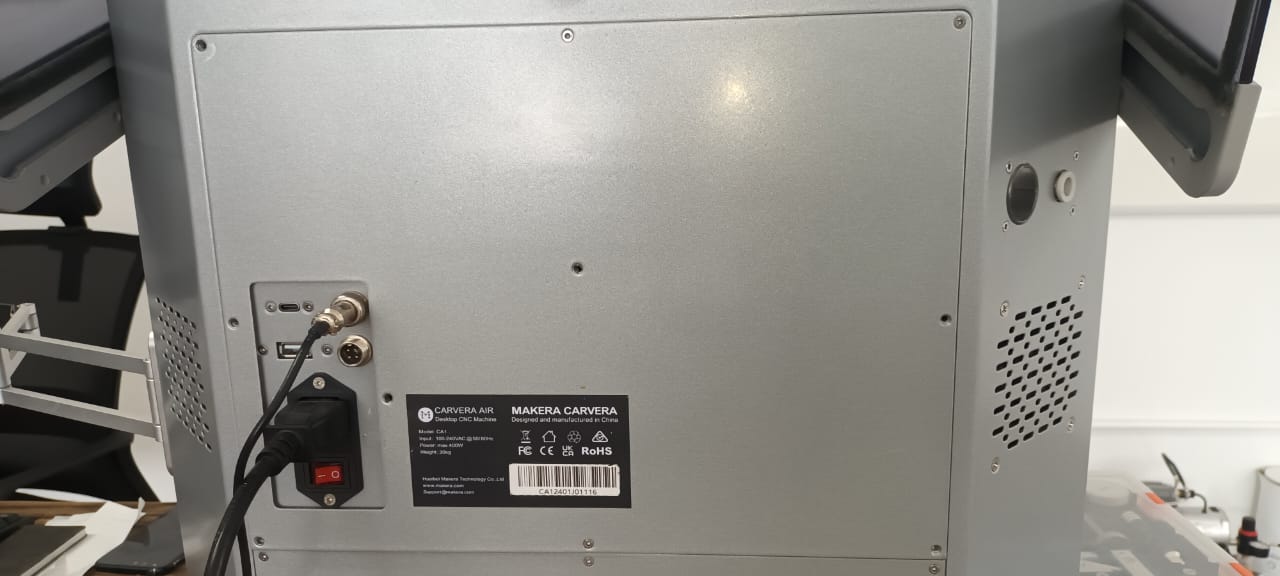
Using a screwdriver, unscrew and remove the top rear cover (Figure 1).
¶ 2.2 Unscrewing the Socket Cluster (Optional, for better access)
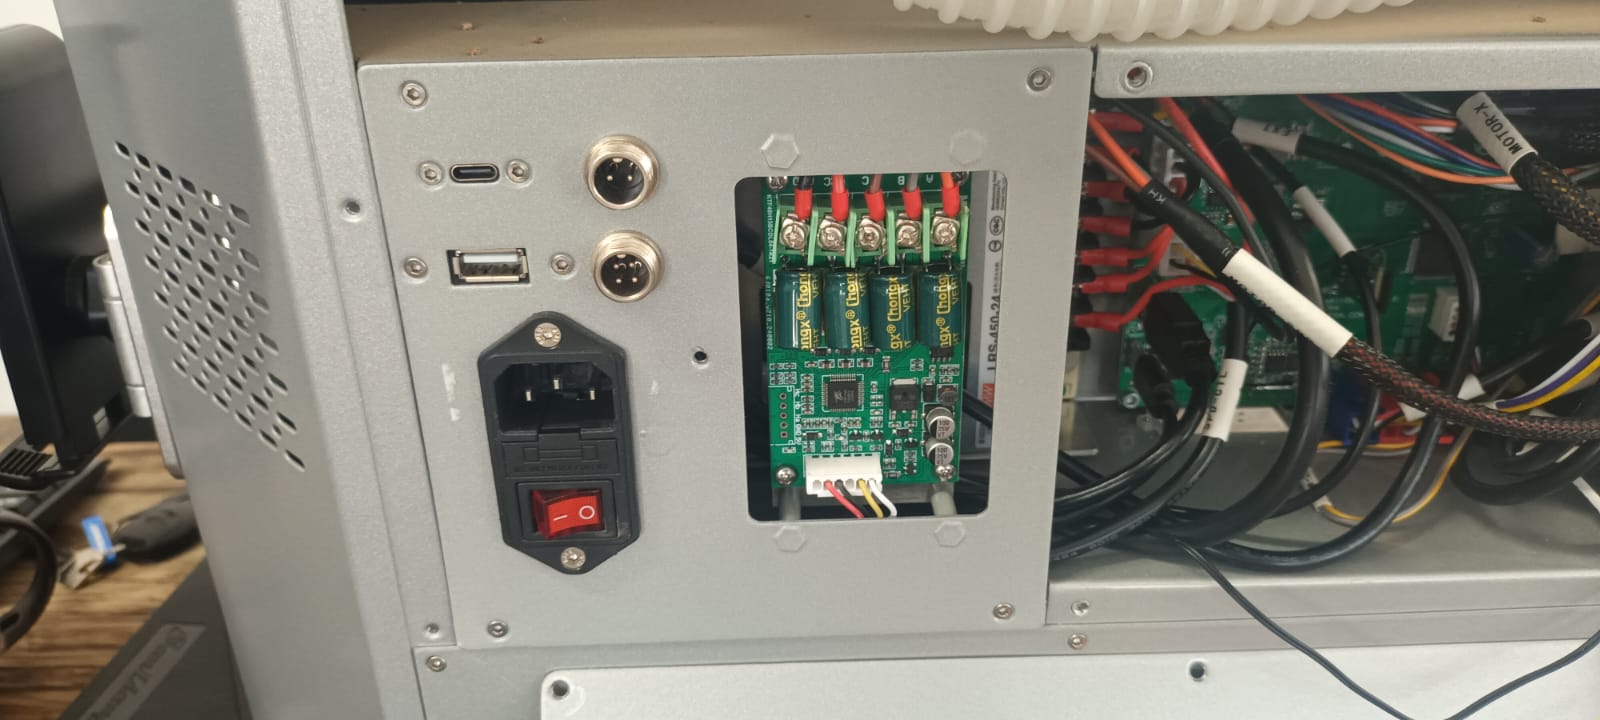
Remove the four screws securing the socket cluster.
This step is not mandatory but provides better access to the mainboard (Figure 2).
¶ 2.3 Disconnecting Cables & Wi-Fi Antenna
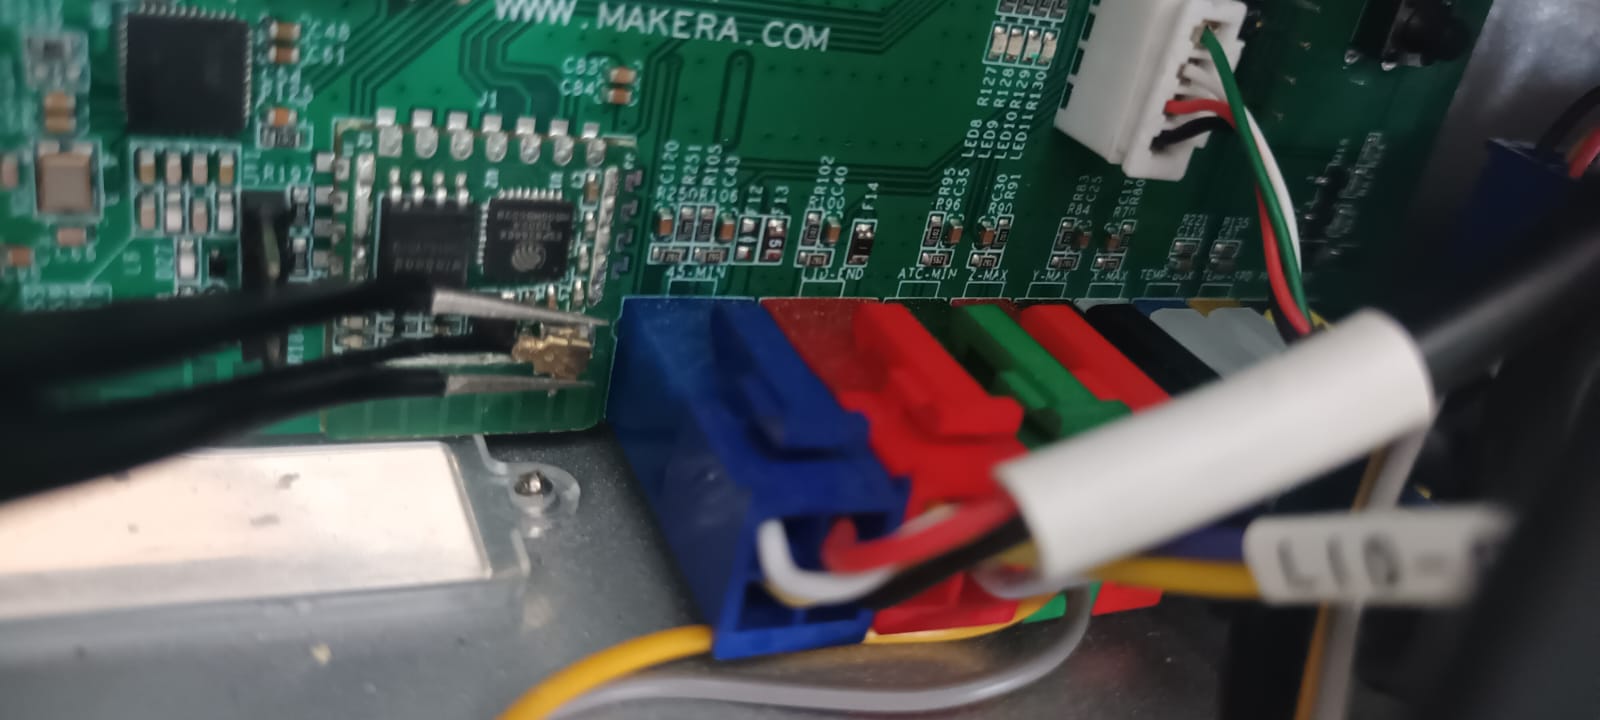
Unplug the USB cables first.
Carefully remove the Wi-Fi antenna using bent tweezers (Figure 3).
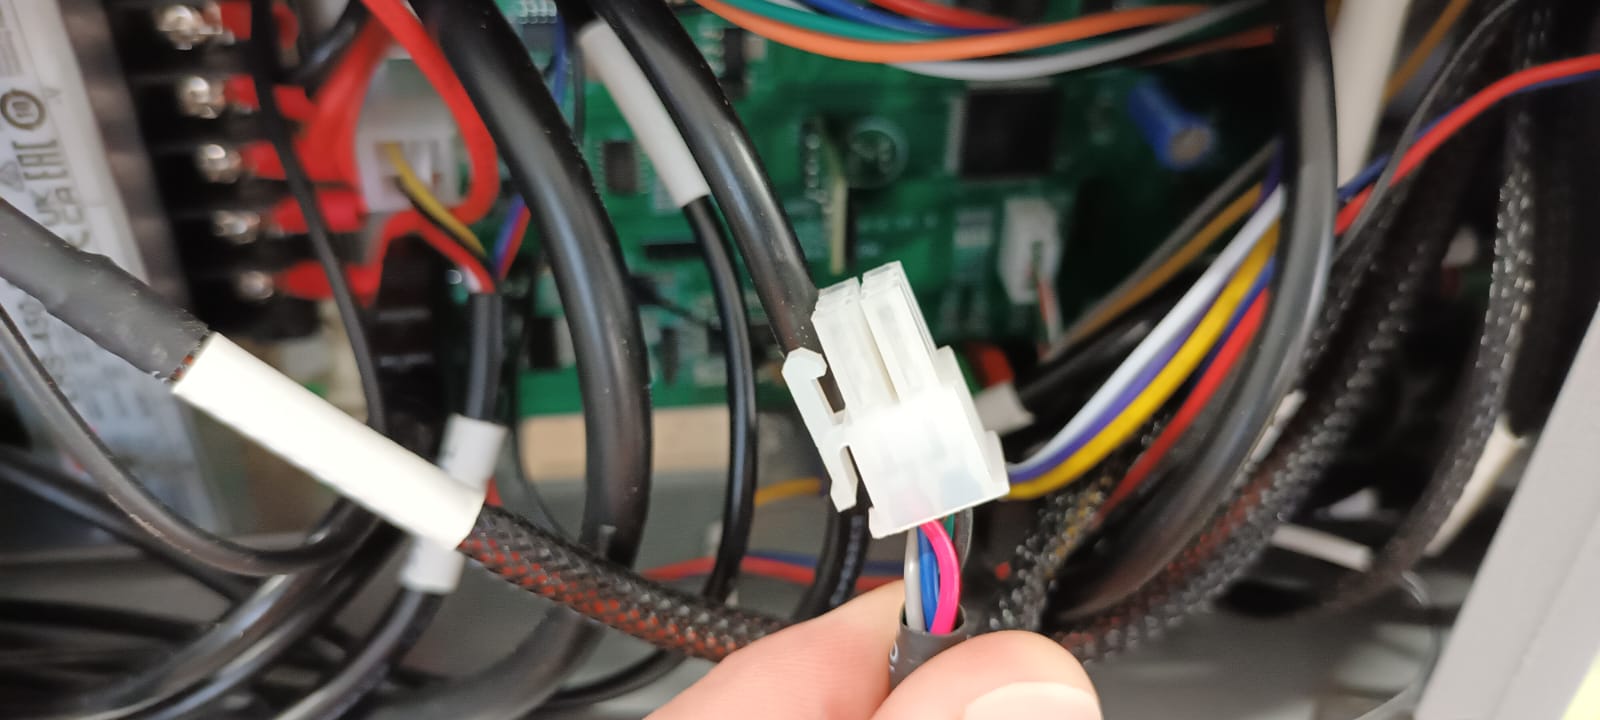
Work around the mainboard, unplugging all connectors:
Each connector has security clips on the sides that must be pressed before unplugging (Figure 4).
¶ 2.4 Removing the Mainboard Screws
The mainboard is secured by four screws (one at each corner).
Use a 3mm Allen key to unscrew them carefully (Figure 5).
Avoid dropping screws, as they may cause damage.
"A dropped part will always land where it can do the most damage." – Sod/Murphy’s Law
¶ 2.5 Transferring Components to the New Mainboard
Remove the SD card and drivers from the old mainboard.
Install them onto the new mainboard (Figure 5).
¶ 3. Installing the New Mainboard
¶ 3.1 Mounting the Mainboard
Align the new mainboard in place.
Secure it with screws using a 3mm Allen key.
¶ 3.2 Reconnecting the Wi-Fi Antenna
Use tweezers to position the Wi-Fi antenna over its socket.
Keep it parallel to the mainboard, then press it firmly into place.
A flat-end Allen key works well for this task.
¶ 3.3 Reconnecting All Cables
Starting from the right side, reconnect each cable to its corresponding header.
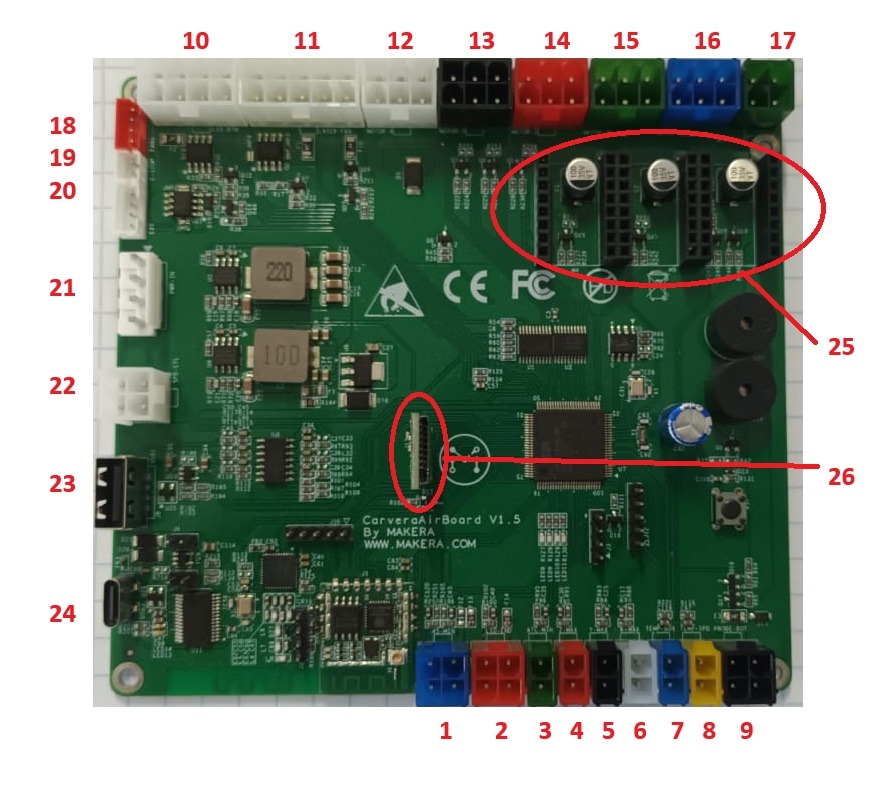
Use the diagram in Figure 5 for reference.
| 1 | 45min | 10 | LED Bin | 19 | E-stop |
|---|---|---|---|---|---|
| 2 | Lid End | 11 |
Laser module (Laser Probe) |
20 | Ext |
| 3 | ATC min | 12 | x Motor | 21 | Power |
| 4 | z max | 13 | y Motor | 22 | Spd ctr |
| 5 | y max | 14 | z Motor | 23 | USB 1 |
| 6 | x max | 15 | 4th Motor | 24 | USB 2 |
| 7 | Temp box | 16 | Motor 5 | 25 | Driver sockets |
| 8 | Temp spd | 17 | ATC motor | 26 | SD Card |
| 9 | Probe | 18 | Fan 1 |
Each connector is color-coded and labeled to prevent mistakes.
¶ 4. Setting Up Network Connection
¶ 4.1 Powering On the Machine
Reconnect the power supply and emergency stop (E-stop) button.
Turn on the machine.
¶ 4.2 Connecting to the Carvera Wi-Fi
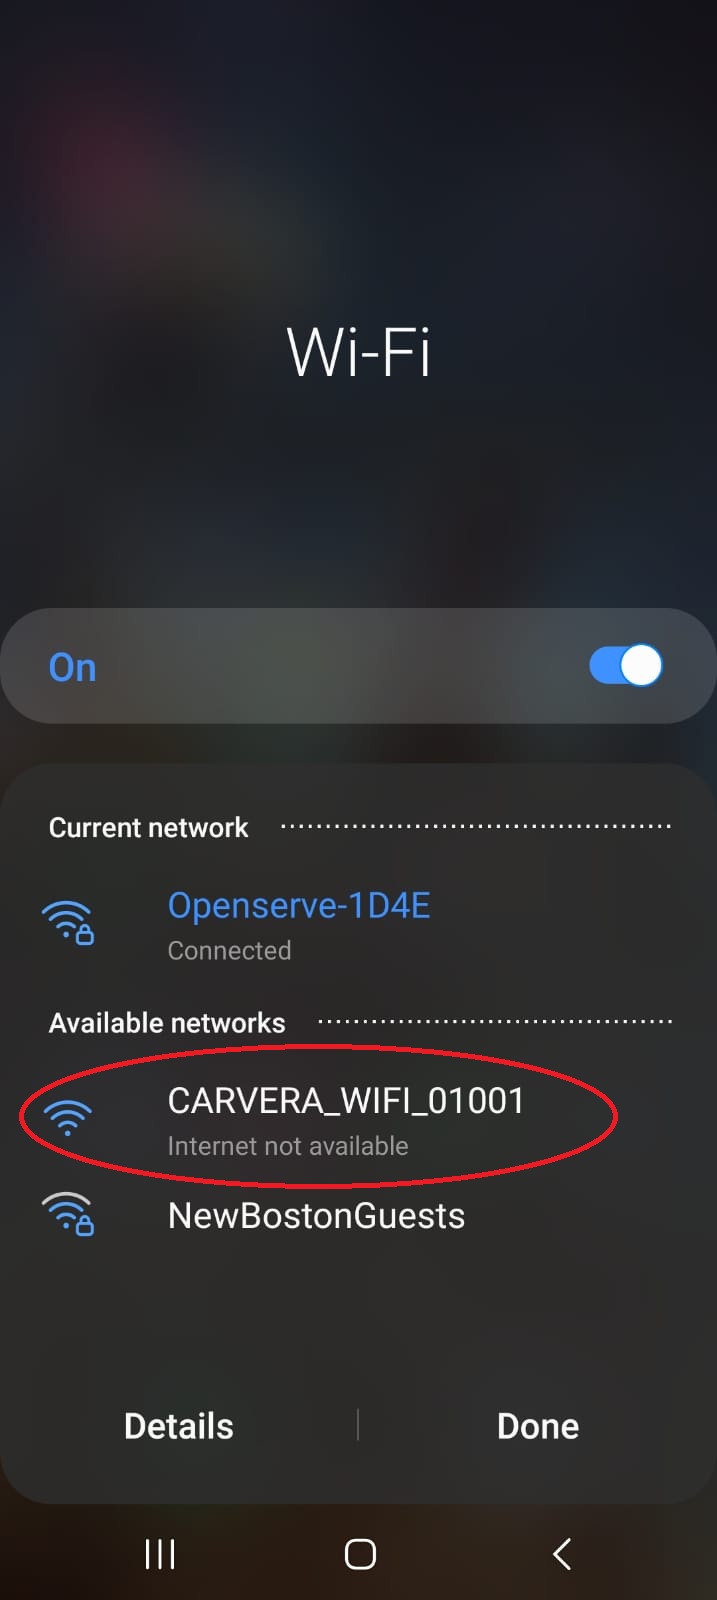
On your PC or mobile device, search for available Wi-Fi networks.
Locate and connect to the Carvera Wi-Fi network, which appears as:
"Carvera_WiFi_*" (Figure 6).
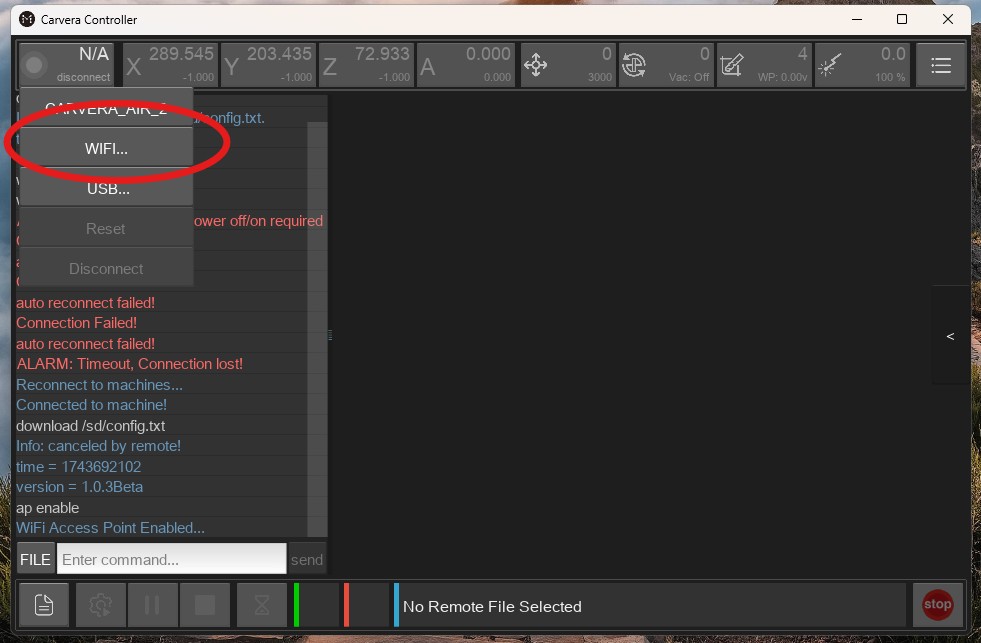
Open the Carvera Controller App.
Search for your Carvera machine and connect (Figure 7).
¶ 4.3 Connecting to Your Local Network
Open the Tools menu (Figure 8).
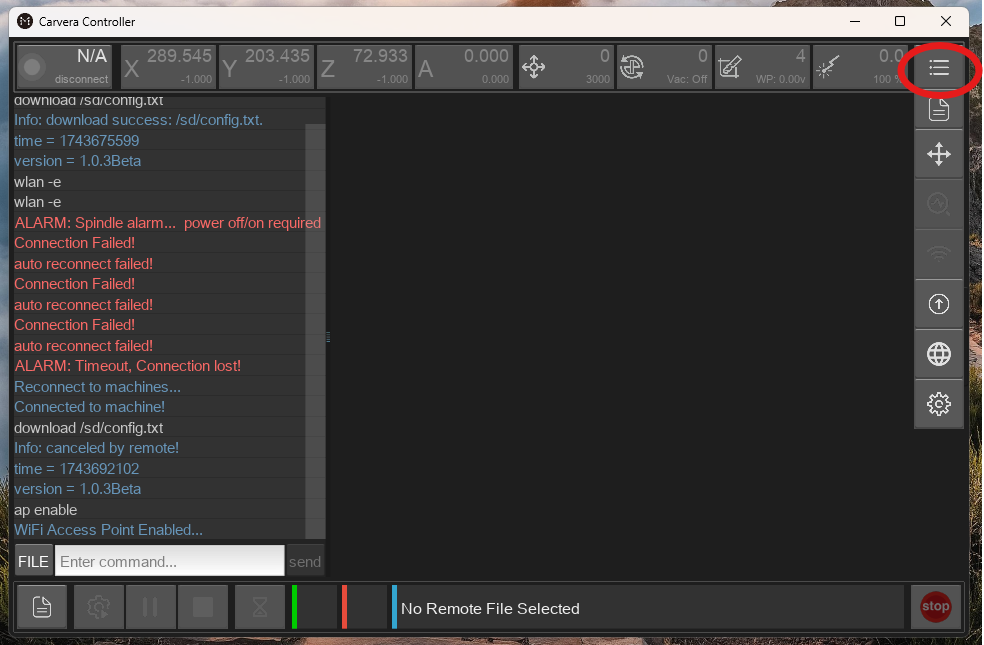
Select the Wi-Fi symbol.
Choose your local network (Figure 9).
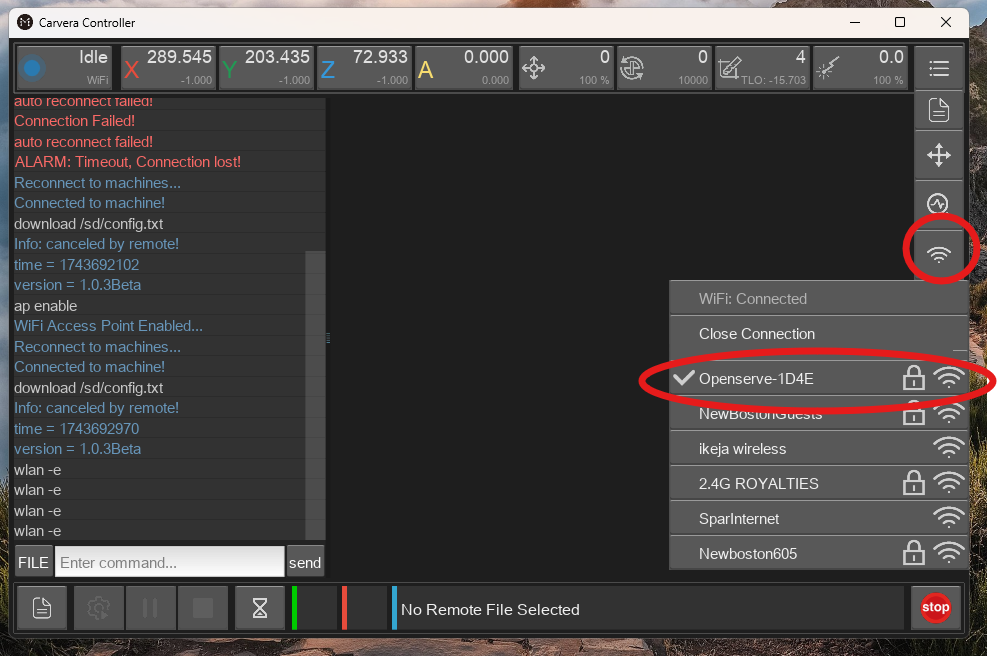
If prompted, enter your Wi-Fi password.
Once connected, reconnect your PC or phone to your normal network.
¶ 5. Final Steps & Verification
✔ Securely close the back panel.
✔ Verify that the machine powers on and connects properly.
✔ Your Carvera Air mainboard replacement is now complete! ✅